Sunday, February 26, 2012

Purse

Pink Purse...
For my birthday last year, my mom took my sister and I to The Homestead in Glen Lake, Michigan.  It was a beautiful place.  While we were shopping in the quaint shop called The Cottonseed, I found the cutest hot pink/fuchsia purse.  I got a lot of complements on the purse.  Sadly, it started to fall apart in the first few months. The Cottonseed gave me a full refund and paid for the shipping too! 
So, for this project, I decided to find that pink color and make the bag out of it.  I took the free pattern from Field’s Fabrics and just scaled it down.  I think I made it a bit too small to make it functional for me. I may try a size in between the ruffle bag and this one.

Ruffle Bag


 My Mom asked about my blog tonight when I was over there for dinner. It made me realize it has been a bit since I posted anything. So here goes...
I got a sewing machine for Christmas and I love it. It is a Husqvarna H-Class 100Q. It is funny to think that when I was growing up my Mom wanted to teach me to sew and I wasn’t interested. It is funny how much you change as you get older. I find myself excited to try new things and sometimes impatient to learn the right steps. I call my mom all the time for sewing lessons, but it can be difficult for me to understand and difficult for her to explain the next step on the phone. Lucky for me she does come over and give me lessons whenever she can.
This is the bag that I made using the free pattern from Field’s Fabrics. I got the ruffle idea from a pin on Pinterest which leads you to Ucreate blog. This tutorial has you buying a premade bag and adding the ruffles and rosettes.
My first attempt at the bag was not good. I ended up ripping it apart and starting over...thank goodness for the trusty seam ripper. When giving it another try, I thought through the steps before putting the bag together.
I cut out the pieces to the bag and before sewing the two sides together, I added the ruffles, so the edges are nice and neat. I attached my rosettes with a glue gun. I added the rosettes after watching this rosette video tutorial .

Wednesday, December 21, 2011

Yarn & Felt Wreath

This is the wreath I made.  It was easy to do.  I have tried the different flowers and found it made it more unique.  It was easy to make!

Saturday, December 3, 2011

Felt Wreath


This was my craft for the day. I followed the directions from the pin that JoAnn Fabrics put on Pinterest. I did a few things differently. I wrapped the styrofoam form with strips of felt. I didn't use the crystal pins in the green felt flowers (costly and they wouldn't really show up). Also, I used hot glue to hold them in place and I anchored them with just regular  sewing pins (helps to use a thimble to push them into the styrofoam).

I like the way that it turned out, but I think I would make the felt strips 1 1/2" strips instead of 2". Also, I think I would make more of the flowers to go around the outside. Also, I don't know if I would add a ribbon or just keep it simple. I tried using white tulle for the bow, but I didn't like the way it looked. Maybe if I had red it might have looked better. There are so many variations of red, I wish I would have taken the red felt along with me to find one that was a better match. Also, I like the cluster of red flowers in a group rather than a row. 

The most time consuming part was sewing the flowers. The project was fairly inexpensive as I used coupons for almost everything I needed. I bought the regular sewing pins at Hobby Lobby for 40% off, the pearl corsage pins from JoAnn Fabrics for 40% off. The felt is only 4 for a $1.00 and I bought the styrofoam wreath for $5.00. Thinking about making one as a gift for the holiday.  If I do, I will post pics of the steps to make it.  It really is easy to do!

Tuesday, November 22, 2011

Snowman


Well, I am the room representative for my daughter's first grade class and had to find some crafts to do. I of course went on Pinterest and found so many cute things that it was hard to choose. Also, my mom went to a craft fair and bought a cute snowman that gave me the idea.
Here is the finished product...


If you want to make one, these are the supplies you will need...


*    Glue Gun
*    White Acrylic Paint
*    White Glue
*    Foam brush
*    Glitter (Clear)
*    Orange Pipe Cleaners (1” for nose)
*    Silver Metallic Pipe Cleaners (4” for band of ear muffs)
*    Brown Pipe Cleaners (snowman’s arms)
*    Pom-poms for the ear muffs (I choose Christmas colors from Hobby Lobby because they were % off.)
*    Ribbon, fleece, or yarn (I choose to use some cute tinsel ribbon I found at Hobby Lobby.)
*    2” Styrofoam ball
*    Small flowerpot (I found this at Michael's.  I brought in the 2” ball and picked the right size.)
*    Toothpick
*    Black Tempera Paint
1.   Paint the pot with two coats of acrylic paint.  You may choose to use spray paint, I just didn’t want to freeze out in the garage.  After the paint is dry...
2.    Using the foam brush, apply a thin layer of glue and put it in a bowl and sprinkle it with glitter.  After the glue/glitter is dry...
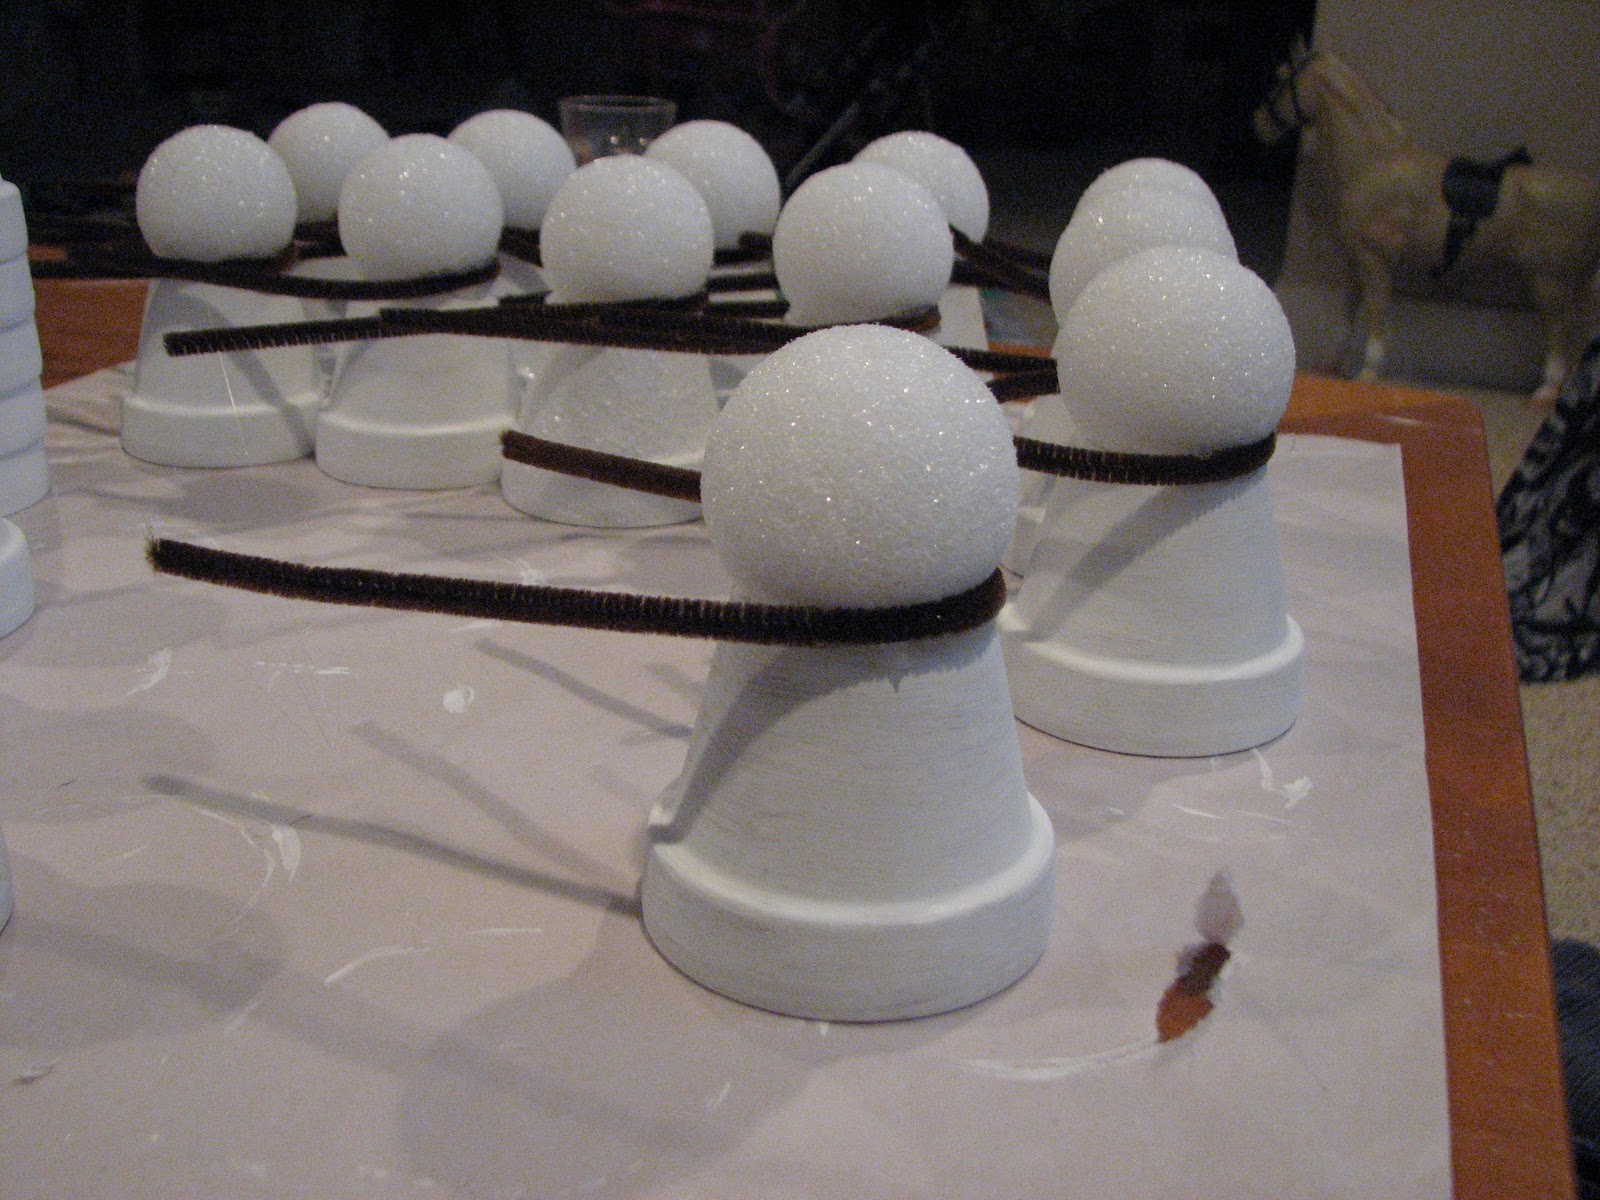
3.   Take the 2” Styrofoam ball and cut one edge off so that it can sit flat on top of the flower pot.

4.   Use the hot glue gun (low setting) and put a bead of glue on the bottom edge of the flower pot and put the head on top.
5.   Put a bead of glue on the back where the head is sitting on the pot and attach the brown pipe cleaner.
6.   Use a silver metallic pipe cleaner (about 4”) and bend in toward the inside.  Use a toothpick and poke a hole in one side of the snowman’s head.  Then put the pipe cleaner in and do the same on the other side.

7.   Use a glue gun and attach the pom-poms where the silver metallic pipe cleaners are pushed into the Styrofoam. 

8.   Use the toothpick and poke a hole for the nose and put the orange pipe cleaner in.

9.   Add the scarf around the neck and tie it in a knot.
10.            Using black tempera paint and a toothpick to add eyes and a mouth.

11.            Fold the brown pipe cleaner up to make the snowman’s arms.


Sunday, November 20, 2011

Felt Corsages


I have been trying my hand at making these corsages that I found on Pinterest.  I have scaled them down to a bit smaller and put hair clips on the back so that my daughters and nieces can wear them with their pony tails.  I also tried to put a spin on it and making the petals a little smaller.  I will post pictures when I make the next one to show you how I did it. 

I purchased a button maker at Hobby Lobby and used ribbon to make the centers for some of the flowers.  I also used buttons I liked and jewels for a little sparkle.  My girls love them.  My niece was wearing one when she came to Grandma & Papa's house for dinner...so cute! 

Closet Organizing


Well, after getting some tips on Pinterest (http://delightfulorder.blogspot.com), I decided to organize my linen/hallway closet.  My daughter of course wanted to help get everything in the right place...easy to roll the washcloths and put them in the bin.  I love when I can find ways to let them help out.  Here is how it turned out..